


Table of Contents
- What You'll Need Before You Frame Fine Art Prints
- Choosing Archival Framing Materials
- The Best Glass for Art Prints: Glazing Options Compared
- How to Mount Fine Art Prints Without Causing Damage
- Step-by-Step: How to Frame Fine Art Prints at Home
- Troubleshooting Common Framing Mistakes
- Budget-Friendly Framing That Still Looks Professional
- Conclusion
Last Updated: August 24, 2026
Framing is where a print either earns its place on the wall or disappears into it. Most guides treat it as an afterthought, but the way you frame fine art prints determines how long they last, how they read in a room, and whether the work retains value over time. This guide from Filipp Jenikae Art Prints covers materials selection, archival standards, mounting techniques, and the practical steps to do it right at home. The core principle is conservation first, aesthetics second.

What You'll Need Before You Frame Fine Art Prints
Good framing starts at the supply stage. Walk into a craft store without a list and you'll come home with materials that look fine but will damage your print over five to ten years.
Tools and Supplies Checklist
- Frame with adequate rabbet depth (minimum 3/8 inch for print + mat + backing)
- Acid-free mat board, beveled edge cut
- Acid-free foam core or archival mounting board for backing
- UV-protective glazing (acrylic or museum glass)
- Linen or Japanese tissue hinge tape (not pressure-sensitive tape)
- Framing points or glazier's points and a point driver
- Acid-free dust cover paper or kraft paper
- D-rings, hanging wire, and wall anchors rated for your frame weight
- Soft cotton gloves
- A clean, flat work surface
Rabbet depth is the interior channel inside the frame profile that holds the glazing, mat, print, and backing. Measure your total stack thickness first, then choose the frame.
Choosing Archival Framing Materials
Most framing failures are material failures. The print survives; the mat board or backing doesn't, and acid migration destroys the image from behind.
Frame Profiles, Finishes, and Rabbet Depth
For contemporary fine art prints, a clean profile with a flat or slightly stepped face creates the most neutral presentation. Frame finishes fall into practical categories: natural wood, painted wood, and metal. Natural wood works well with warm-toned or textured prints. Painted wood in matte black or white is most versatile for contemporary work. Metal profiles in silver or brushed aluminum read well with graphic, high-contrast images.
Solid wood frames are more stable than MDF in humid environments. Rabbet depth is the specification most people ignore until it's too late. A standard print with 4-ply mat board, acid-free foam core backing, and 2mm acrylic glazing needs a rabbet depth of at least 3/8 inch, often closer to 1/2 inch.
Acid-Free Mat Board and Backing
Acid-free mat board is manufactured without acidic compounds that would otherwise migrate into the print and cause yellowing or brittleness. Conservation-grade mat board is also lignin-free and buffered with calcium carbonate to neutralize any acid that enters from the environment.
The standard for archival quality is 4-ply mat board with a beveled edge cut at 45 degrees. A generous mat, typically 2.5 to 4 inches on each side, gives the image room to breathe and creates a gallery-style presentation. The backing board should also be acid-free. Standard cardboard off-gasses acids over time. Archival foam core or museum board is the correct choice.
According to the Library of Congress preservation guidelines, acidic materials in direct contact with works on paper are among the most common causes of long-term deterioration.
The Best Glass for Art Prints: Glazing Options Compared
Choosing the best glass for art prints is one of the most consequential decisions in framing.
Standard glass is heavy, breaks into sharp shards, and offers no UV protection. It's the cheapest and worst option for any print you care about.
UV-protective acrylic blocks a significant portion of UV radiation, which is the primary driver of ink fade in pigment prints. It's lighter than glass, shatter-resistant, and easier to handle. The trade-off is that it scratches more easily and can attract dust.
Museum glass is the premium option: optically coated glass with anti-reflective treatment and UV protection. The image appears to float without a reflective barrier. The cost is substantially higher, but for a significant print in a prominent location, it's the right choice.
According to conservation resources from the American Institute for Conservation, UV-protective glazing is considered a baseline requirement for any print intended for long-term preservation.
A spacer between the glazing and the print surface prevents condensation from causing the print to stick or develop pressure marks. The mat board typically provides this separation.
| Glazing Type | UV Protection | Weight | Break Risk | Best For |
|---|---|---|---|---|
| Standard glass | None | Heavy | High | Low-value decorative prints only |
| UV acrylic | High | Light | Low | Most fine art prints |
| Museum glass | High + anti-reflective | Medium | Medium | Significant or collectible works |
| Conservation glass | High | Medium | Medium | Archival / institutional framing |
How to Mount Fine Art Prints Without Causing Damage
The mounting method you choose determines whether the print remains in original condition or becomes permanently altered. For any print with lasting value, reversibility is the standard.
Hinge Tape vs. Dry Mounting vs. Float Mounting
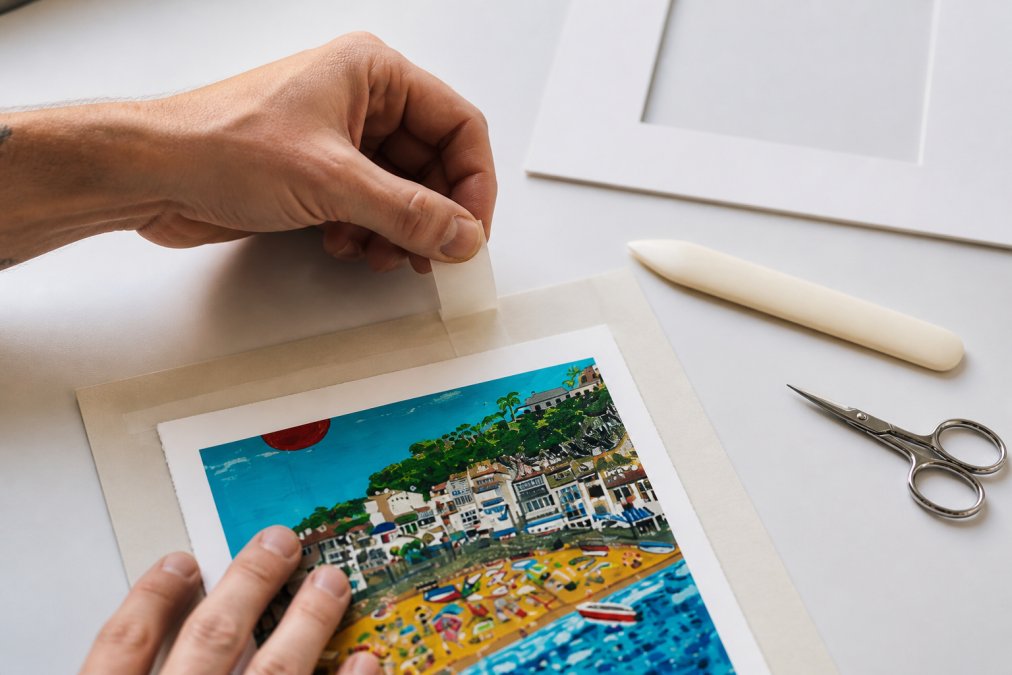
Hinge mounting is the archival standard. Strips of linen or Japanese tissue tape are applied to the top edge of the print only, attaching it to the backing board. The print hangs freely, can expand and contract with humidity changes, and can be removed without damage. This is the method used by conservation framers for works on paper.
Dry mounting uses heat-activated adhesive tissue to bond the print uniformly to a mounting board. The result is flat and clean. The problem: it's irreversible. Once dry-mounted, a print cannot be separated from the board without damage. For prints with collector value, dry mounting is not appropriate.
Float mounting creates the visual effect of the print hovering over the backing board, with edges visible. The print is attached at the back with small tabs or hinges, and the mat reveals the full image to its edges. This works particularly well for prints with a white border.
Step-by-Step: How to Frame Fine Art Prints at Home
Total Time: 45-90 minutes depending on frame complexity Difficulty: Beginner to intermediate
Step 1: Measure your print dimensions accurately [Time: 5 minutes] Measure the print itself, not the paper. Note the image area and total paper size including any white border.
Step 2: Choose your frame size [Time: 10 minutes] Standard frame sizes (8x10, 11x14, 16x20, 18x24, 24x36 inches) are significantly less expensive than custom sizes. If your print dimensions don't match, consider a custom mat cut to bridge the gap.
Step 3: Cut or order your mat board [Time: 5-20 minutes] The mat window should be cut approximately 1/4 inch smaller on each side than the image area, so the mat overlaps the print edge slightly. A quality mat cutter is essential for a clean 45-degree beveled edge, or most framing shops will cut mats to specification.
Step 4: Attach the print using hinge tape [Time: 10 minutes] Put on cotton gloves. Place the print face-down on a clean surface. Fold two small strips of linen tape into T-shapes and attach them to the top edge of the print back. Press the print into position on the backing board and allow to dry under light pressure.
Step 5: Assemble the frame stack [Time: 10 minutes] Clean the glazing on both sides before assembly. Layer in this order from front to back: glazing, mat board, print on backing board. Ensure the print is centered and the mat window aligns correctly.
Step 6: Secure with framing points [Time: 5 minutes] Use a point driver or hand-set glazier's points to secure the stack inside the frame rabbet. Space points approximately 4 inches apart around the perimeter.
Step 7: Apply dust cover [Time: 5 minutes] Cut acid-free kraft paper slightly larger than the frame back. Apply double-sided tape to the frame back edge, press the paper down taut, then trim the excess with a blade.
Step 8: Attach hanging hardware [Time: 5 minutes] Attach two D-rings to the frame back, positioned roughly one-third down from the top. Run hanging wire through both D-rings with enough slack to hang without the wire showing above the frame top.
Troubleshooting Common Framing Mistakes
The print is cockling or rippling inside the frame. This usually means the print was dry-mounted without uniform pressure, or the hinge points are too tight. For hinge-mounted prints, re-hinge with only two points at the top, allowing the print to hang freely.
The mat is yellowing. The mat board wasn't acid-free. Replace it immediately with conservation-grade board and inspect the print surface for any staining.
Condensation is forming on the inside of the glazing. The frame is in a location with high humidity fluctuation, or the print is hanging on an exterior wall. Relocate the piece and consider conservation glass rather than acrylic.
The hanging wire is showing above the frame top. The D-rings are positioned too high, or there's too much wire slack. Reposition the D-rings lower on the frame back and reduce wire length.
The glass has a persistent haze. Clean museum glass and UV acrylic with a lint-free microfiber cloth only, with no chemical cleaners. For stubborn marks, a small amount of isopropyl alcohol on the cloth is acceptable.
Budget-Friendly Framing That Still Looks Professional
Professional-looking results don't require professional framing prices. The key is knowing where the quality difference is visible and where it isn't.
Where to spend: glazing and mat board. UV-protective acrylic and conservation mat board are the two upgrades that most directly affect the print's longevity and visual quality.
Where to save: frame profiles. A clean, simple moulding in painted wood or metal will look just as good as an expensive custom profile in most residential settings.
Standard vs. custom framing. Standard frame sizes reduce cost significantly. Many fine art prints are produced in dimensions that align with standard frames precisely because it makes framing accessible.
Mat cutting services. Many local framing shops and online services will cut mats to custom specifications at a fraction of the cost of full custom framing.
According to the Fine Art Trade Guild's guidance on print presentation, a well-cut mat with a beveled edge does more for the perceived quality of a framed print than almost any other single element.
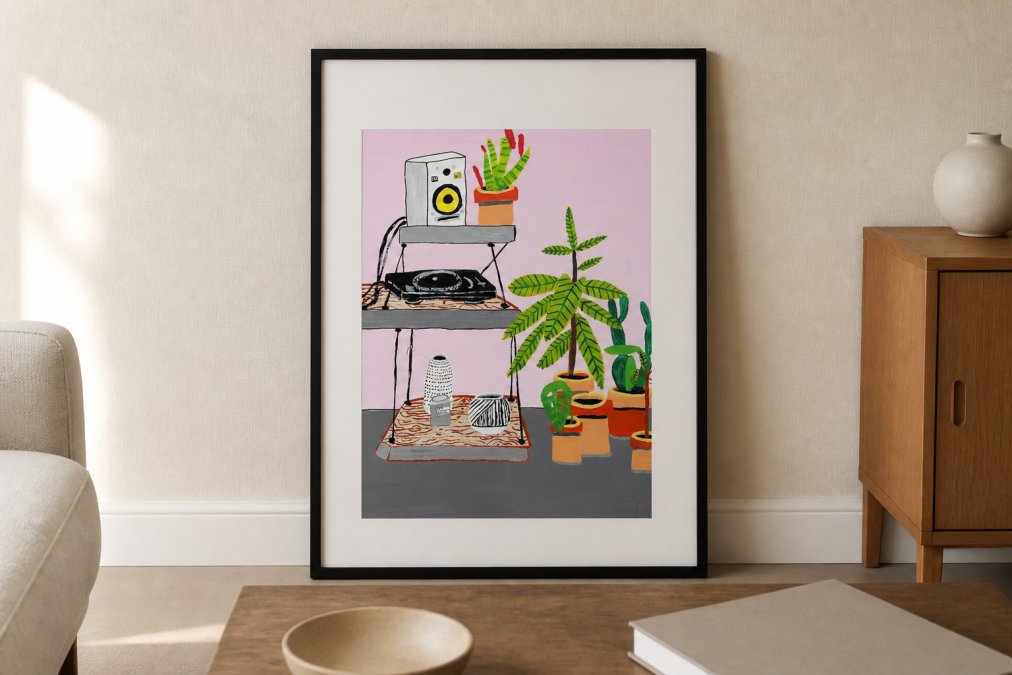
The Living Room print and Living Room and San Francisco from the collection are both produced with a white border and delivered unframed, giving you full control over the framing presentation. Both work well in standard frame sizes with a simple mat. For collectors interested in a more complete presentation, the Limited Edition Hahnemühle Fine Art Print with Handwritten Certificate of Authenticity is printed on Hahnemühle FineArt Pearl paper, hand-signed, and delivered with a handwritten certificate. This is the kind of work that warrants museum glass and conservation framing from the start.


| Framing Element | Budget Option | Better Option | Best Option |
|---|---|---|---|
| Frame profile | Painted MDF | Solid wood / metal | Custom solid wood |
| Glazing | UV acrylic | Conservation glass | Museum glass |
| Mat board | Acid-free (2-ply) | Conservation (4-ply) | Museum board |
| Mounting | Hinge tape (DIY) | Hinge tape (conservation framer) | Float mount with spacer |
| Backing | Acid-free foam core | Archival foam core | Museum board |
Framing a fine art print well requires some upfront attention to materials, but the process itself is straightforward once you understand the logic behind each decision. The goal is always the same: protect the work, present it honestly, and make it last. At Filipp Jenikae Art Prints, every print is produced on archival-quality paper with pigment inks precisely because the framing investment deserves a foundation that will hold up to it. Browse the Transparent Interior print and the wider collection to find work worth framing properly.
Frequently Asked Questions
Should I use a mat board when framing fine art prints?
Yes, in almost every case. A mat board creates negative space between the print surface and the glazing, which prevents the ink from touching the glass and allows the paper to breathe slightly with humidity changes. For conservation framing, the mat must be acid-free with a beveled edge cut. A standard mat width of 2 to 3 inches suits most fine art prints and adds a gallery-quality visual balance to the presentation.
What is the difference between museum-grade and standard framing?
Museum-grade framing uses archival quality, acid-free materials throughout: mat board, backing board, mounting tape, and UV-protective glazing such as museum glass or conservation-grade acrylic. Standard framing often uses regular glass and non-archival mat board that can yellow and off-gas acids over time, degrading the print. For limited-edition fine art prints or anything you intend to keep for decades, conservation framing is worth the additional investment.
How do I frame a print to make it look expensive?
Wide, acid-free mat board in white or off-white creates the most gallery-appropriate presentation and makes the image feel considered rather than rushed. A thin, simple frame profile in black, natural wood, or metal keeps the focus on the artwork. UV protective glazing adds a clean, reflective finish. Avoid busy or ornate frames for contemporary prints. Consistent hanging hardware, straight alignment, and a dust cover on the back complete the professional look.
What type of glass is best for protecting art prints?
Museum glass offers the highest protection: it blocks over 99% of UV radiation and has an anti-reflective coating that makes it nearly invisible. Conservation-grade acrylic is a lighter alternative with similar UV blocking, better suited for large formats or locations where breakage is a concern. Standard glass provides minimal UV protection and is not recommended for fine art prints you want to preserve long-term. For archival framing, never use non-UV glass on pigment inkjet or fine art photography prints.


